Wouldn’t it be great to make a cake for two with just one egg? We’re making a quick square cake using everyday ingredients. This cake can be made in a short time with few ingredients and no butter, and it is delicious and hard to fail. Homemade cake is so delicious!

| Cook Time | 25 minutes |
| Time for cooling the cake is not included in cook time. |
| Servings |
people
|
| Translator | Get Francis Mug |
|
|

Ingredients
Batter
1 Egg medium or large size, separate the yolk and egg white and chill the white thoroughly 20 g Granulated Sugar 20 g Cake Flour (low gluten or protein flour) 1 tbsp Milk lukewarm
Whipped Cream
100 ml Heavy Cream 35% fat 8 g Granulated Sugar
Other Ingredients
1 tbsp Apricot Jam pureed 1/2 Kiwi Fruit White Chocolate
Kitchen Tools
1 Cake Pan bottom: 11x16cm/4.3"x6.3" | height: 2cm/0.8" Parchment Paper Vegetable Oil
* 1 tablespoon (tbsp) = 15 ml, 1 teaspoon (tsp) = 5 ml
* The ingredients contain Amazon affiliate links.
Instructions
- First, coat the baking pan with vegetable oil to prevent the parchment paper from moving easily. The parchment paper should also be firmly attached to the sides of the pan so that the cake will bake nicely without any bumps.

- Next, beat the egg white. Be sure to use a thoroughly chilled egg white to make a stable meringue. If using a 100 watt hand mixer, set the speed to 5 out of 5.
- When the egg white breaks up and begins to form bubbles, add 1/3 of the sugar.
- When the egg white becomes foamy and streaks begin to appear on the surface, add another 1/3 of the sugar.
- When the foam becomes finer, add the remaining 1/3 of sugar.
- After about a minute and a half, a meringue with stiff peaks should form. The time depends on the type of hand mixer, so this is just for reference.
- A meringue with stiff peaks should not fall off even if you shake the mixer.
- The size of the bubbles may not be consistently uniform at this point, so mix at speed 1 for about 1 more minute to make the texture finer.
- Detach the whisks from the mixer and remove the egg white attached to them and drop it into the bowl. This is an important ingredient because you want to make as much volume as possible with only one egg.
- Now, add the egg yolk.
- Mix it thoroughly with a balloon whisk until the white meringue begins to turn yellow.
- Add half of the cake flour while sifting.
- Using a rubber spatula, slash the center of the mixture, scoop along the side of the bowl and fold it together.
- Repeat this process until the flour is almost entirely incorporated into the mixture.
- Then sift the remaining half of the cake flour into the bowl.
- Continue mixing in the same manner. Mix quickly but be careful not to break up the foam.
- Now, no more flour should be visible, but keep folding the batter further until it becomes glossy.
- When the surface becomes glossy, add a small amount of the airy batter to the lukewarm milk.
- Mix it well.
- Then, add the milk to the batter in the bowl.
- The milk should be thickened in this way before adding it to the batter, so that it blends easily and quickly.
- Transfer the batter to the tray lined with the parchment paper. Clean the bowl with a rubber spatula and transfer all the batter to the tray.
- Spread the batter from the center toward all the corners.
- Then, spread the batter along the edges of the tray to give it an even thickness. You might want to rotate the tray to make it easier to work with.
- Drop the tray twice from a height of about 5 cm (2") to remove large air bubbles in the batter.
- Place it in a toaster oven and bake at 170 °C (338 °F) for about 7 minutes.
- If you use a large oven, preheat the oven beforehand. Also, the baking time depends on the type of oven so adjust it accordingly.
- If the browning is uneven, cover with aluminum foil to adjust it. Cover the areas that you do not want to brown further and continue to brown the lightly colored areas.
- Now, it should be ready.
- The top of the cake is deliciously browned.
- Remove and drop the entire tray once to release excess steam. This will help to prevent shrinkage.
- Let it sit to cool for about 15 minutes.
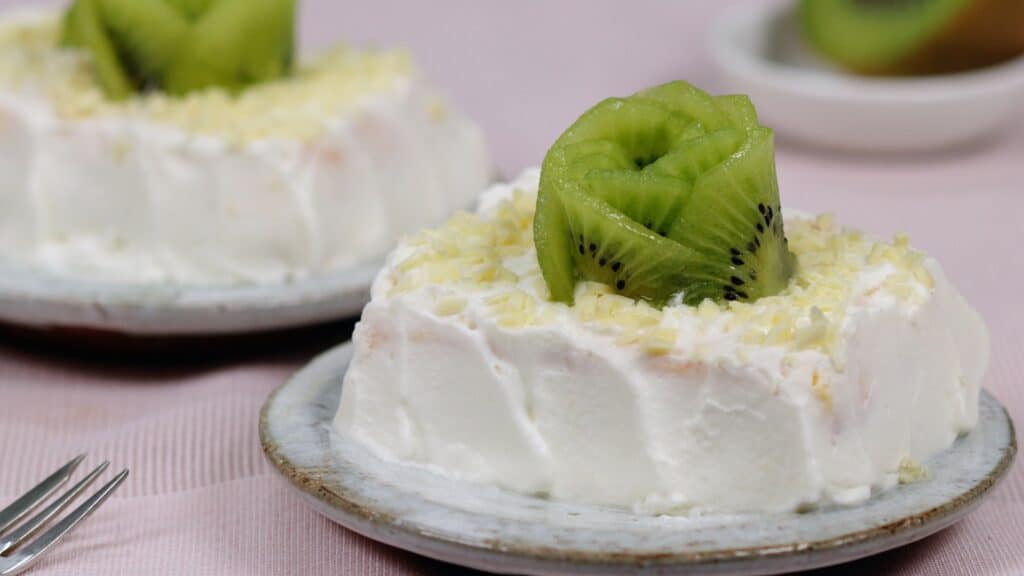
- Let's prepare the rose-shaped fruit topping. Slice the kiwi very thinly. You can also make beautiful orange roses with mango, or use a popular combination of whole strawberries and blueberries.
- Arrange 7 slices of kiwi in a row, shifting them about 5 mm (0.2") apart, and roll them together from one side to form a rose shape.
- You can make a large rose by increasing the number of slices, or a small rose by reducing the number of slices.
- Make another rose.
- When the cake is cool, peel off the parchment paper from the sides. It is moist and fluffy and looks delicious.
- Then, turn it over and remove the parchment paper from the bottom.
- To divide the cake evenly into four squares, use a clean ruler to mark the cake in the middle.
- Wipe the blade of the knife with a damp kitchen towel. Cut the cake in half lengthwise and then cut in half crosswise, quartering the cake.
- Spread a thin layer of apricot jam over the entire surface of the sponge cake. If the jam is too hard to spread thinly, add a small amount of hot water to make it softer.
- Place the sponge cake on top of each other, making a double layer.
- Now, let's decorate the cake with whipped cream. Using an icing spatula, spread the whipped cream on each side of the cake. Fill in any bumps.
- Rotate the cake by 90 degrees and spread the cream on the other side.
- The whipped cream should be relatively soft. The softer the cream is, the less likely it is to become uneven while being coated.
- When all the sides are covered with the cream, place the whipped cream on top and spread it out.
- Spread it generously so that it can overflow a little.
- Then, add more cream to the side and make a diagonal pattern on the surface to make it visually appealing.
- Rotate the cake by 90 degrees at a time and decorate each side of the cake.
- Gently smooth out the uneven edges on top toward the center. Don't worry too much about the surface because you will sprinkle on chocolate next. Just relax and take it easy.
- Now, shave the white chocolate using a Mandoline slicer. Alternatively, you can use a knife to chop it finely.
- Sprinkle the top with your desired amount of chocolate.
- Finally, place a rose-shaped kiwi in the center and it is ready.
- Place the square cake on a cake plate.


Recipe Notes
When making the batter, chill the egg white in the refrigerator beforehand. When the egg whites are cold, the meringue will have finer air bubbles so that the foam does not collapse easily.


i just tried this recipe out recently!! it’s my first time baking, and i messed up the whisking egg white parts…. i misunderstood the 100w thing (canadian appliances often use high wattages compared to japan) and my mixer ended up not creating solid peaks so i tried my best fixing the batter with 1/4 teaspoon of baking soda (for each batch), lol….. i replaced the jam in between the cakes with diced mango and cream in attempt of making something like a mango shortcake! since the mangoes i bought from the store wasn’t ripe, the only flower i made quickly unraveled. i decided to make something of a mango jam – this went between the cakes. at first, i was worried about the sweetness of the cake since the amount of flour and sugar was the same, but the smell that came out of the oven was delightful. this was also the first time i ever made whipped cream so i just eyeballed the sugar in it until i felt that it was sweet enough for me. i topped the cakes with chopped toasted almonds and a small sprout decoration i made from the mangos. either way, it eventually worked out, and i was very happy with what i made!!
this was a really fun recipe to follow as a first-time baker, and i’ll make it again someday!! with improvements, of course.
Glad to hear that you are happy with the result!🍰🥭😋 The sponge cake topped with toasted almonds and mango sounds very tasty😍 Thank you so much for trying our recipe again. Have a wonderful happy new year!🎊